> ## Documentation Index
> Fetch the complete documentation index at: https://composio-27-feat-docs-revamp.mintlify.site/llms.txt
> Use this file to discover all available pages before exploring further.
# Google: OAuth2 single service
> In this guide you'll learn how to create and setup a new Google Project and get the OAuth credentials
## Set up OAuth
There are four steps to connecting your n8n credential to Google services:
1. Create a Google Cloud Project
2. Configure Project
3. Configure your OAuth consent screen APIs
4. Create your Google OAuth Client credentials
## Video Guide
## Steps
First, create a Google Cloud Console project:
* Log in to your Google Cloud Console using your Google credentials
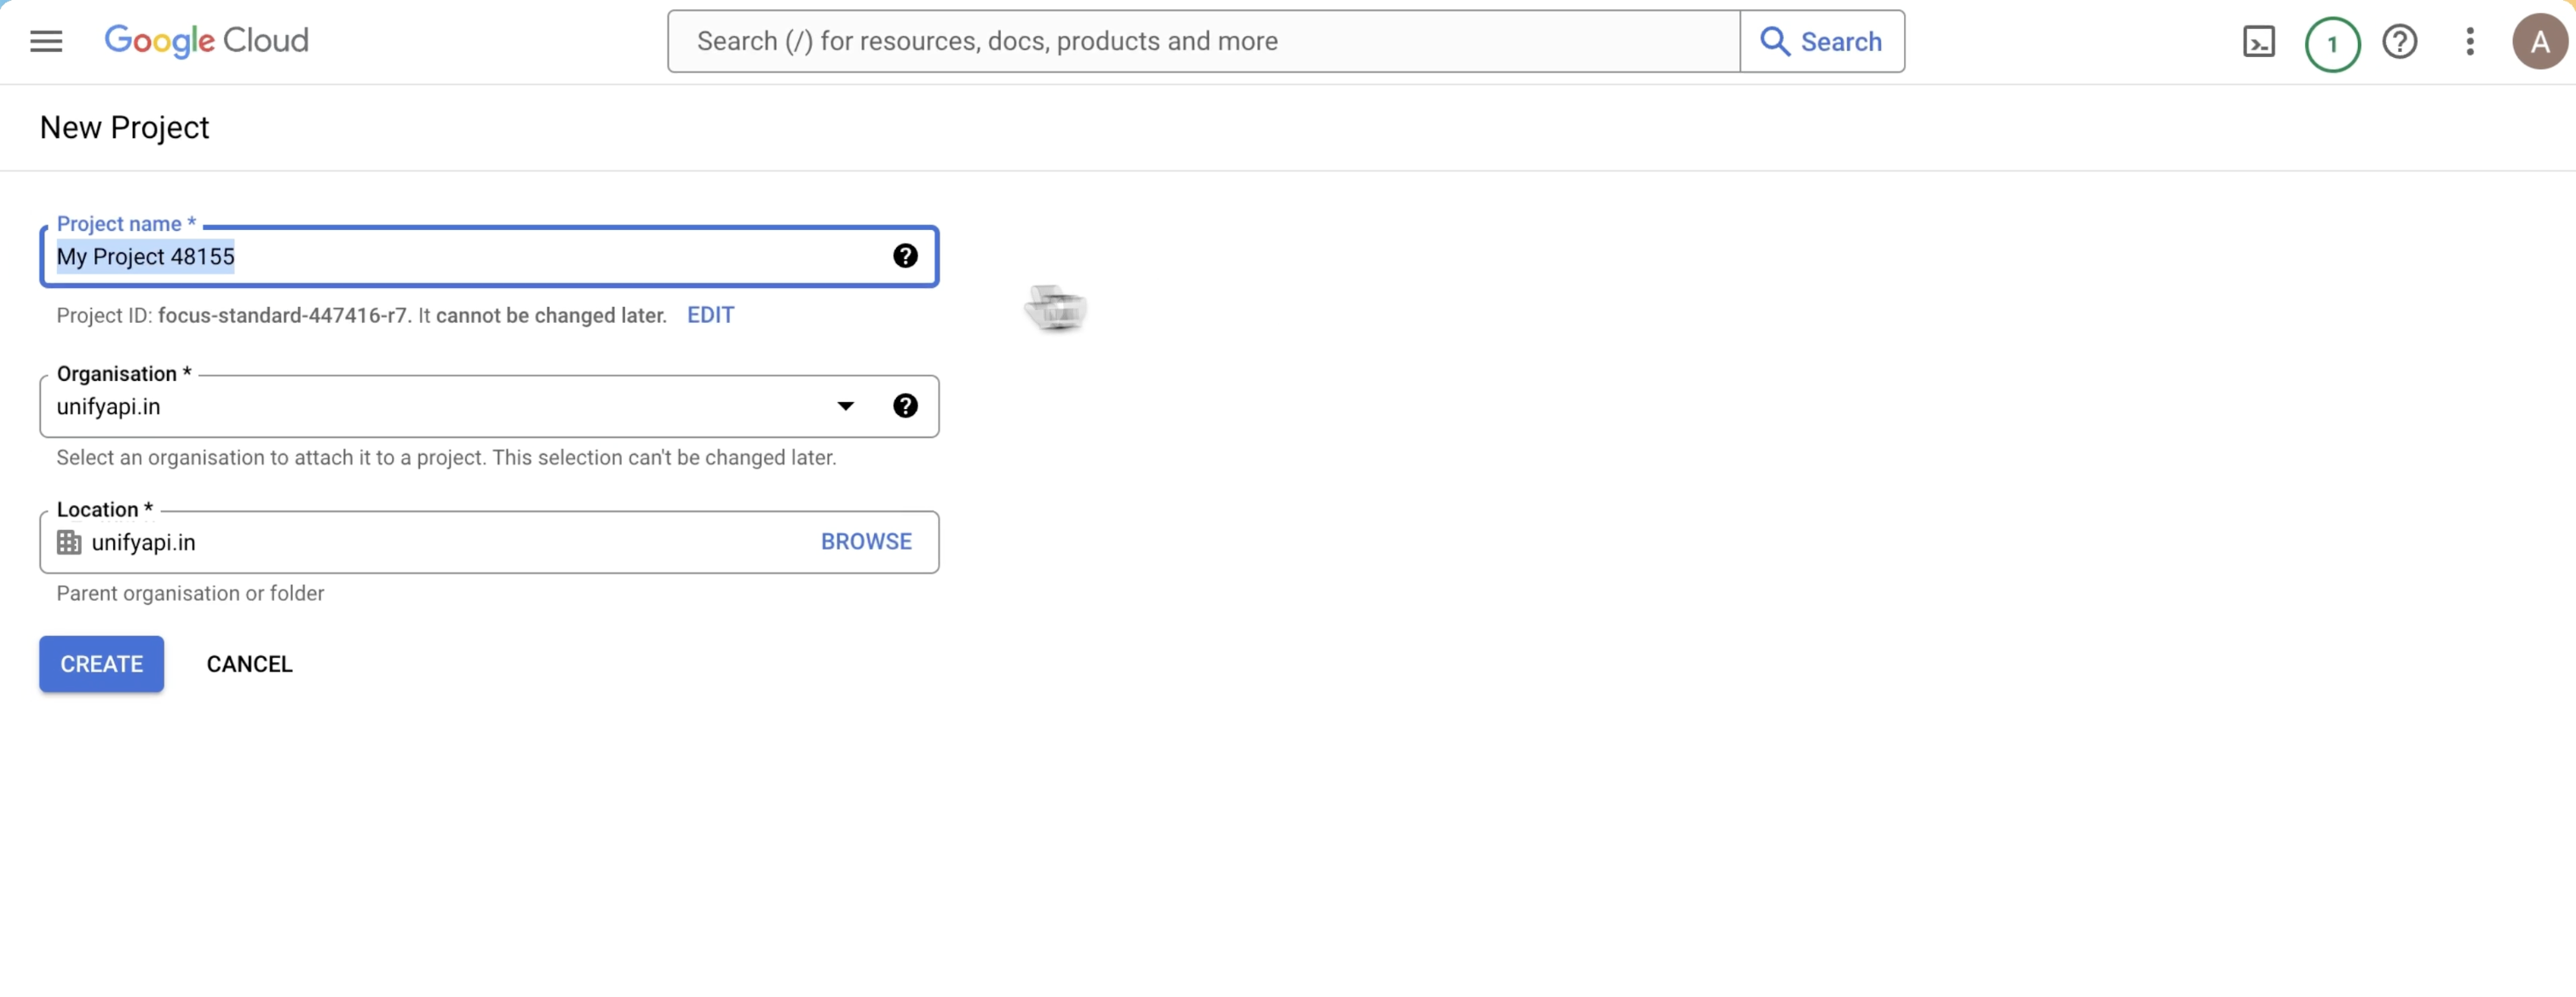
* In the top menu, select the project dropdown in the top navigation and select New project or go directly to the New Project page
* Enter a Project name and select the Location for your project
Head over to APIs and services section of the project:
* Click on overview and configure the project:
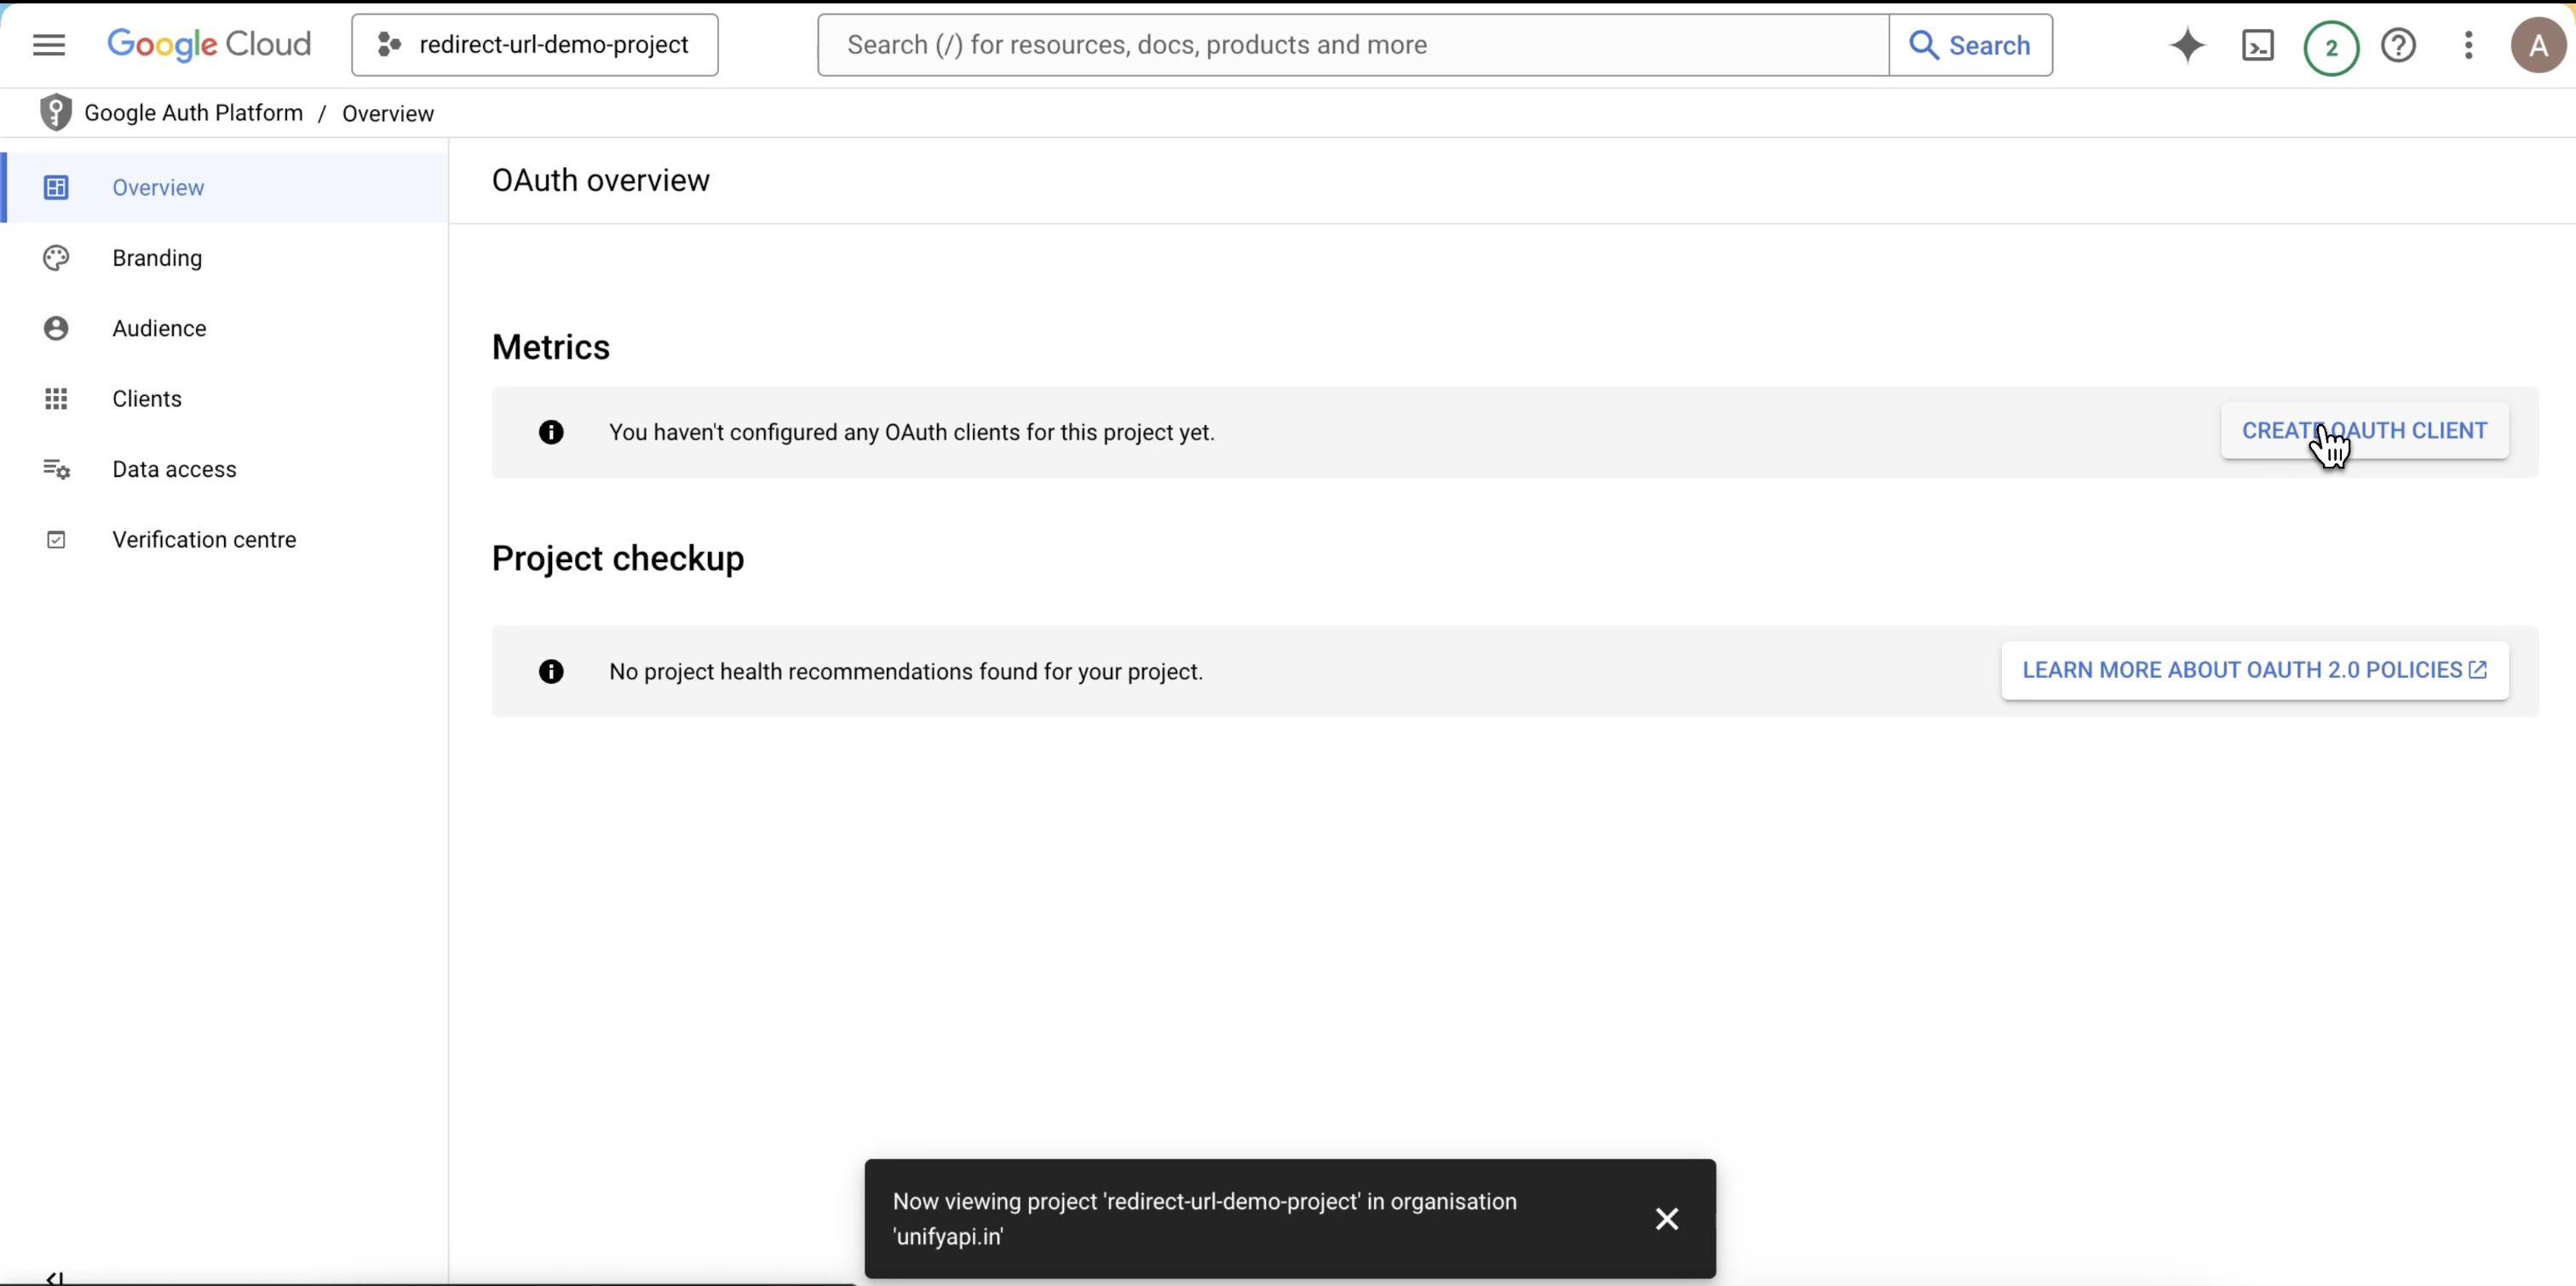
After project configuration, click on Create OAuth client
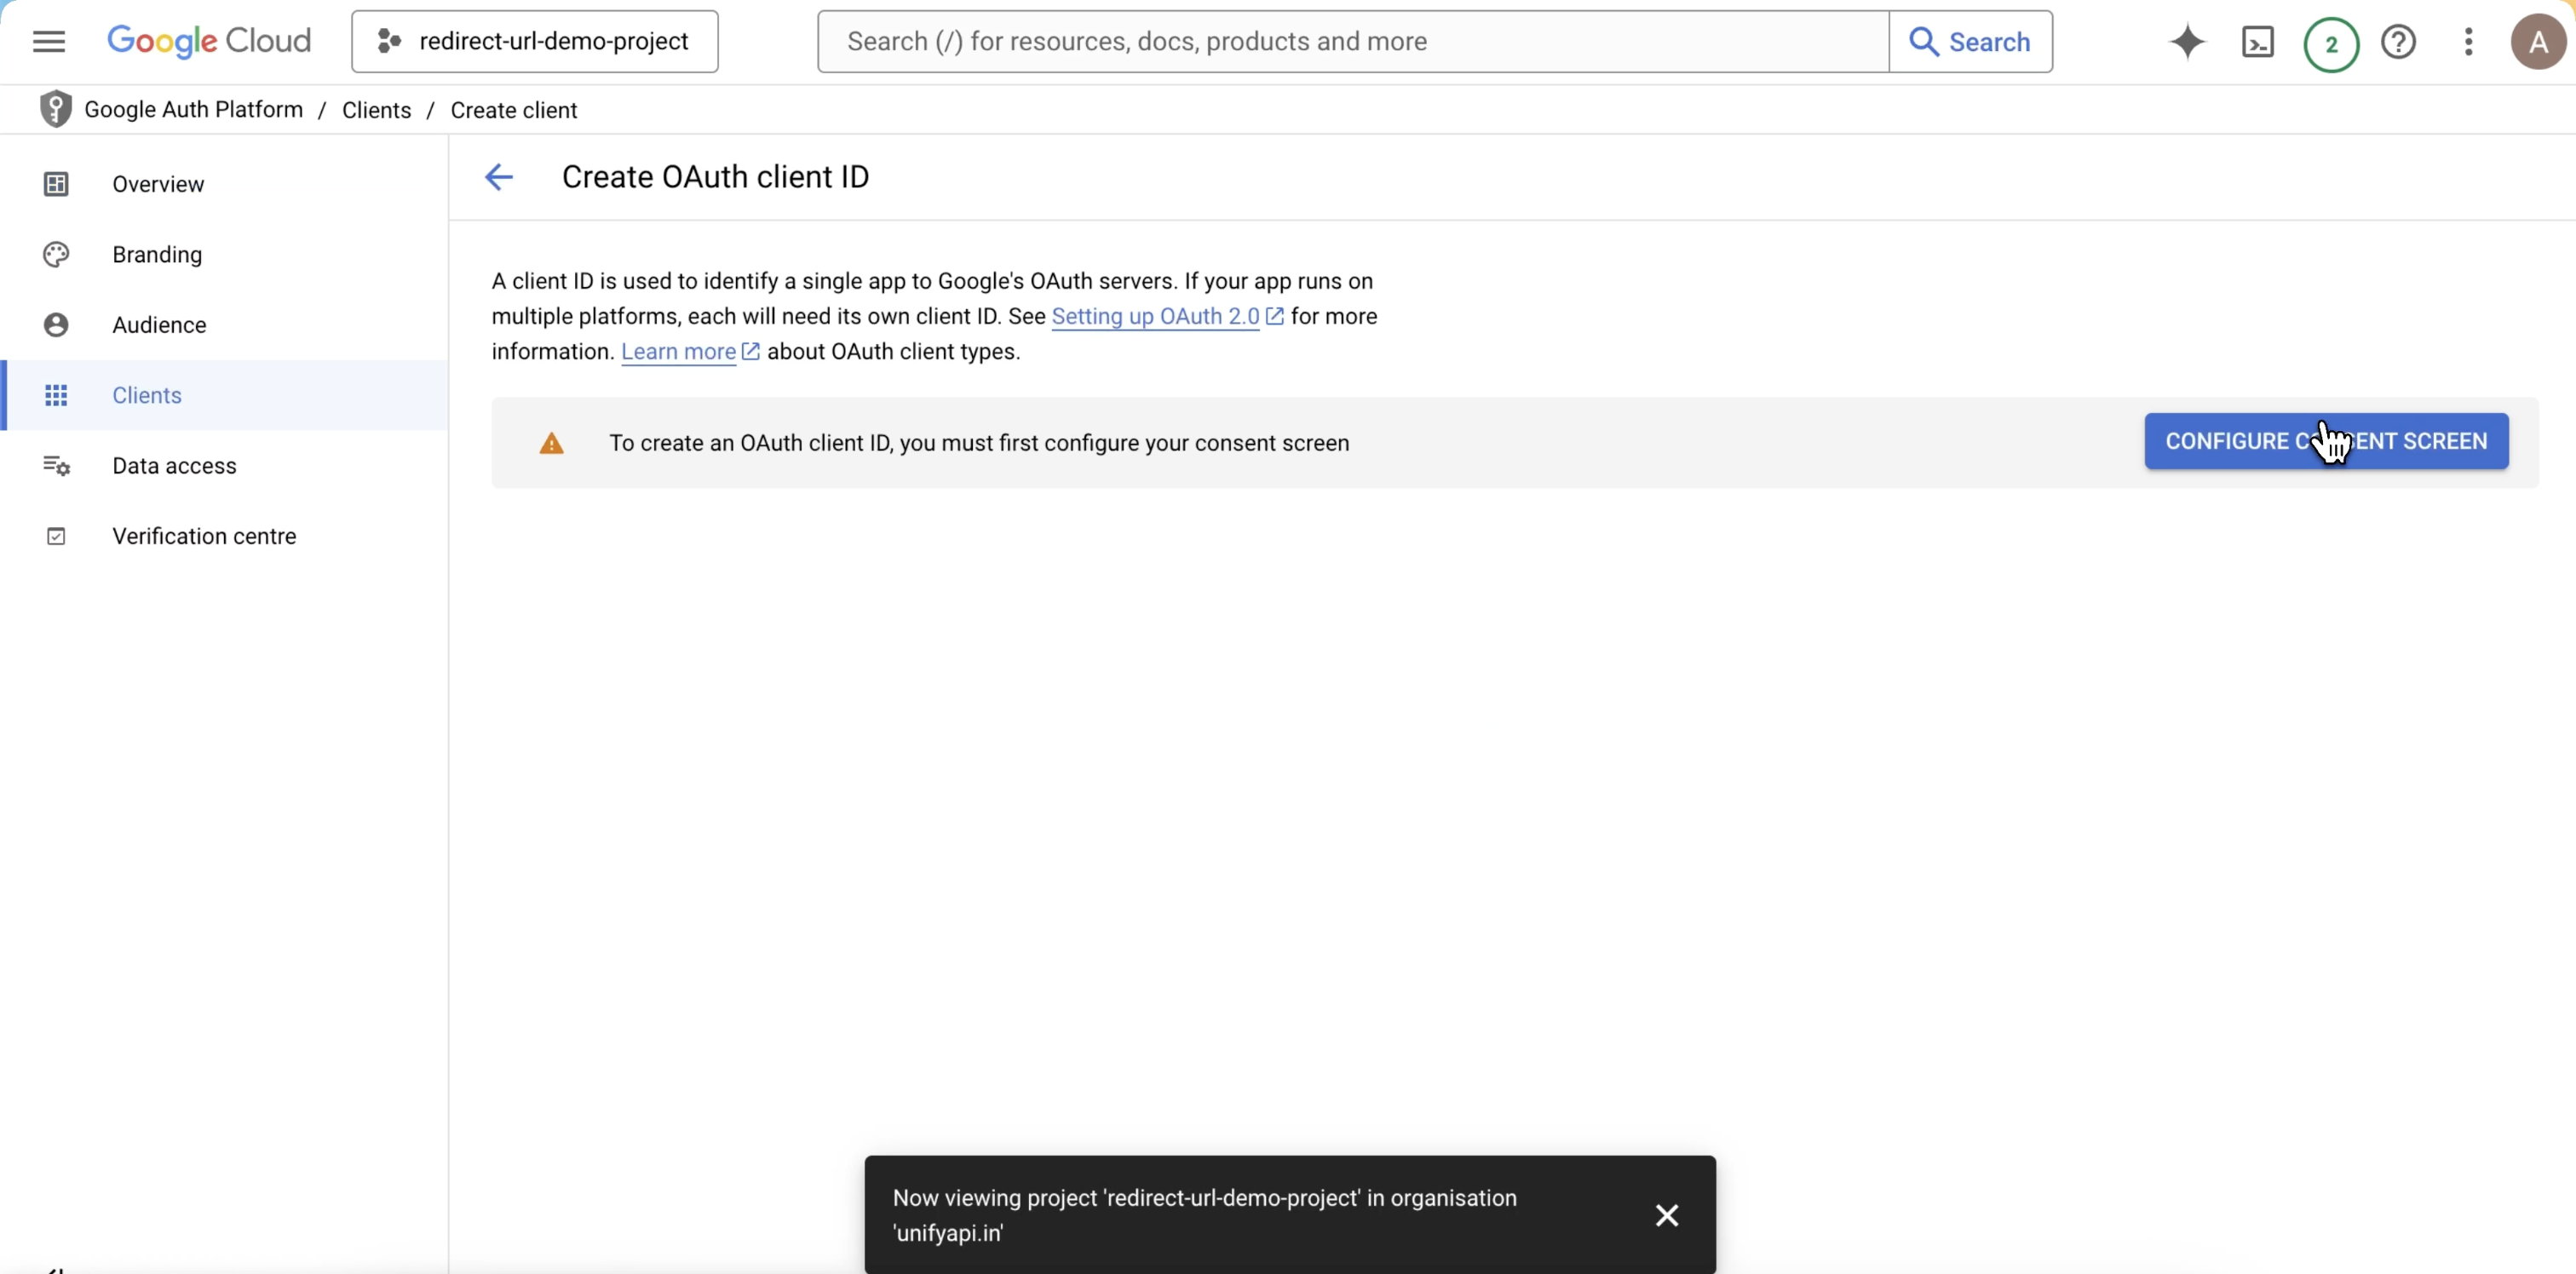
* Click on configure consent screen
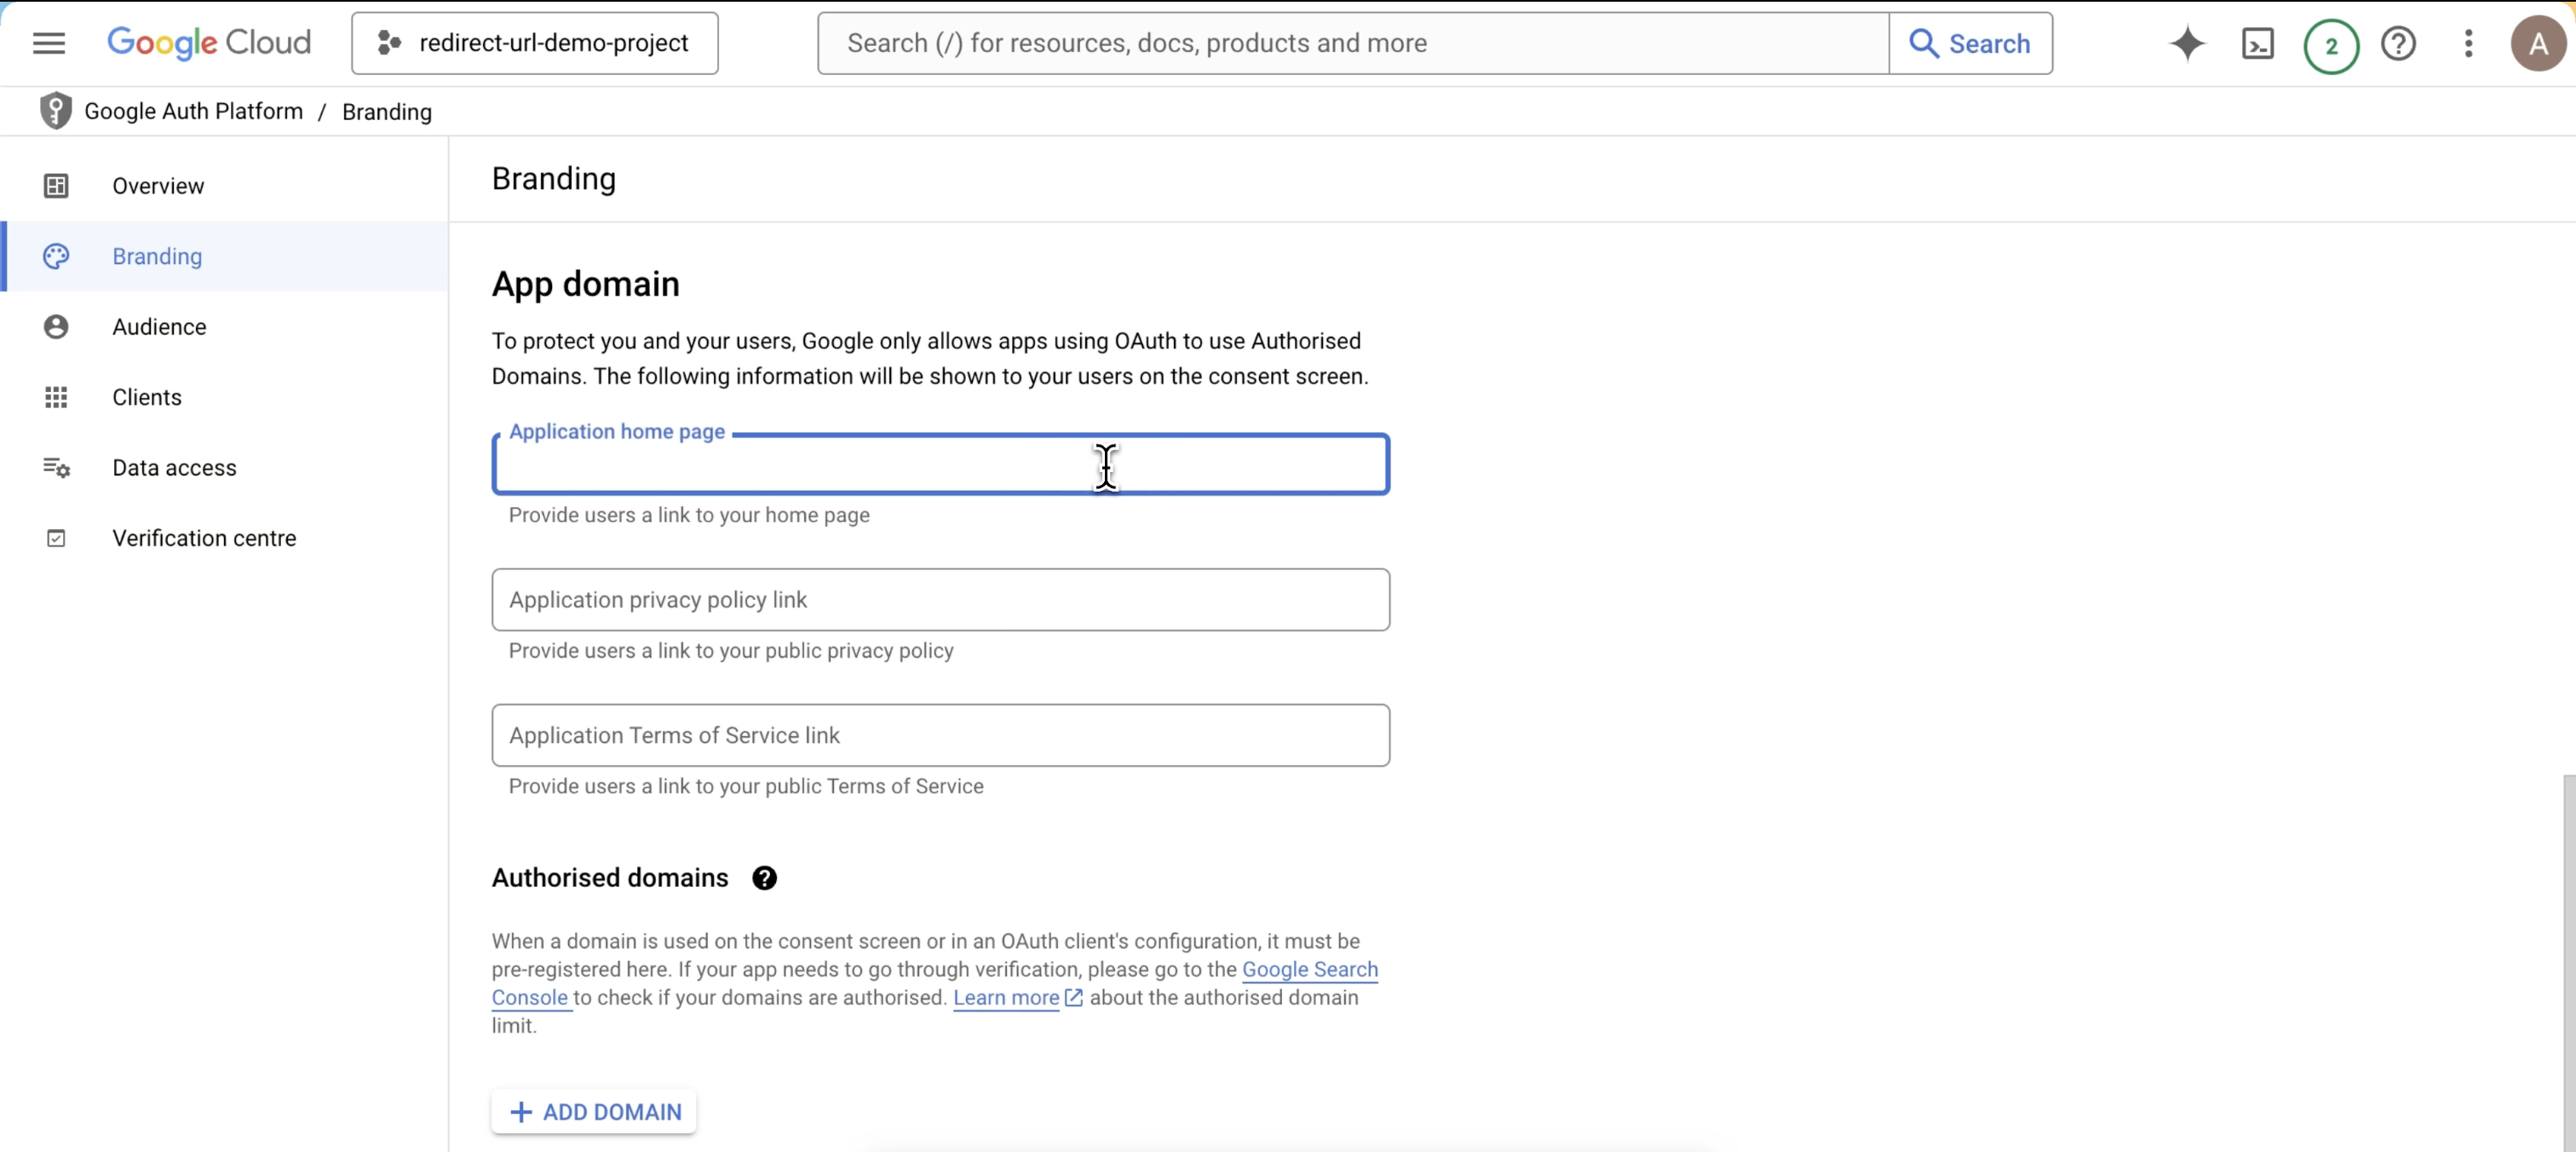
* Configure the branding
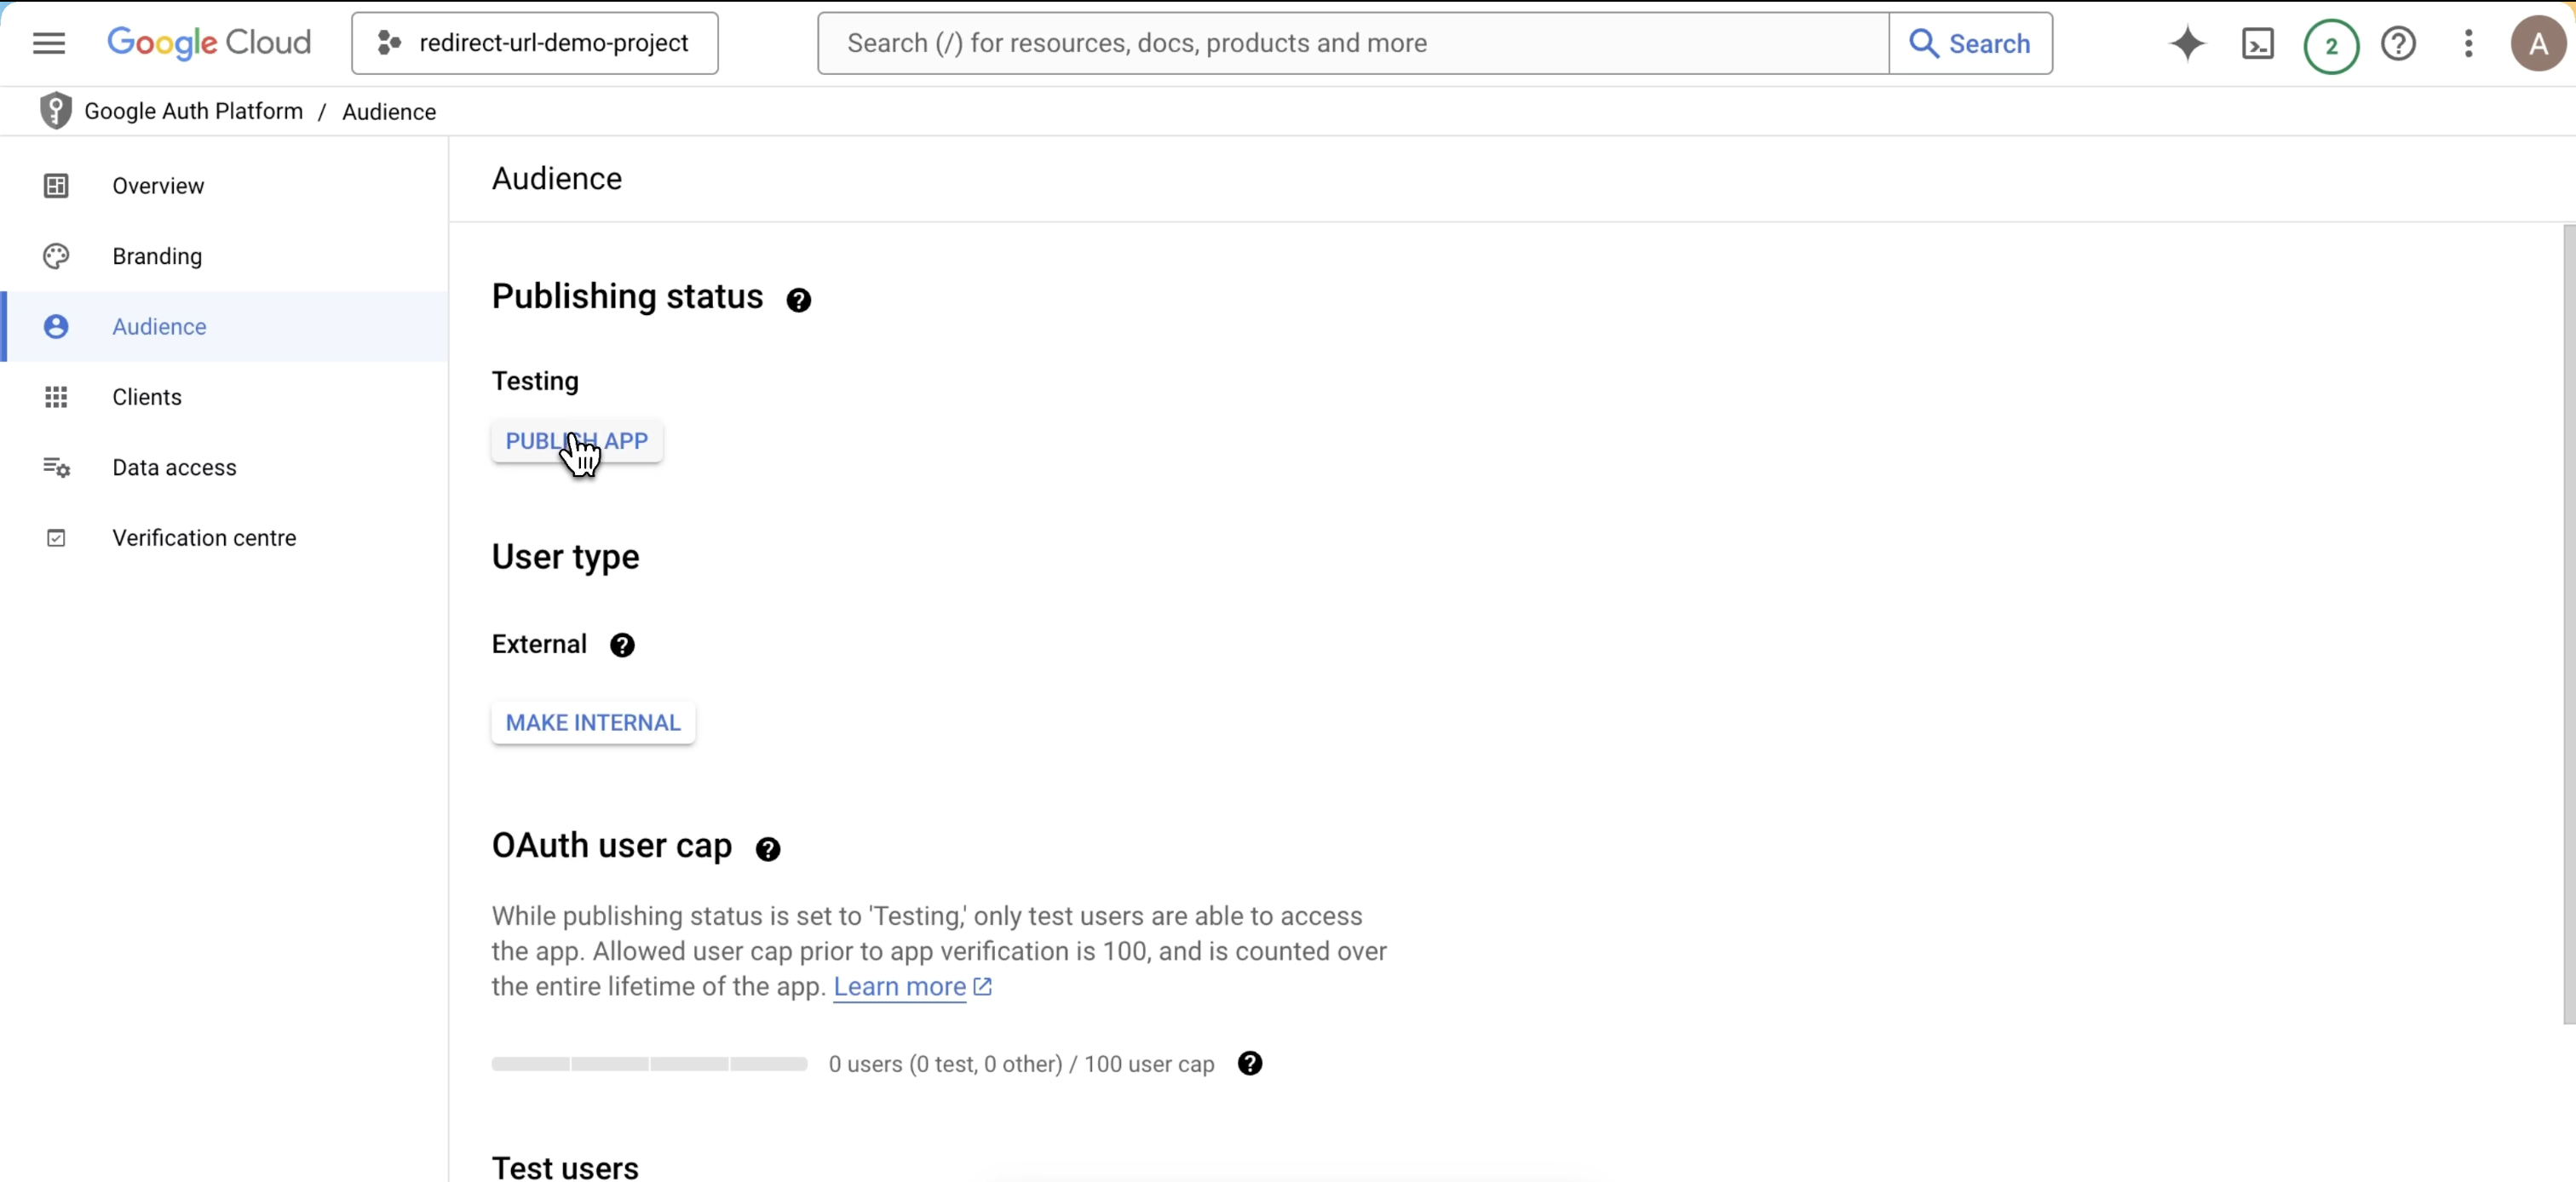
* then publish the app
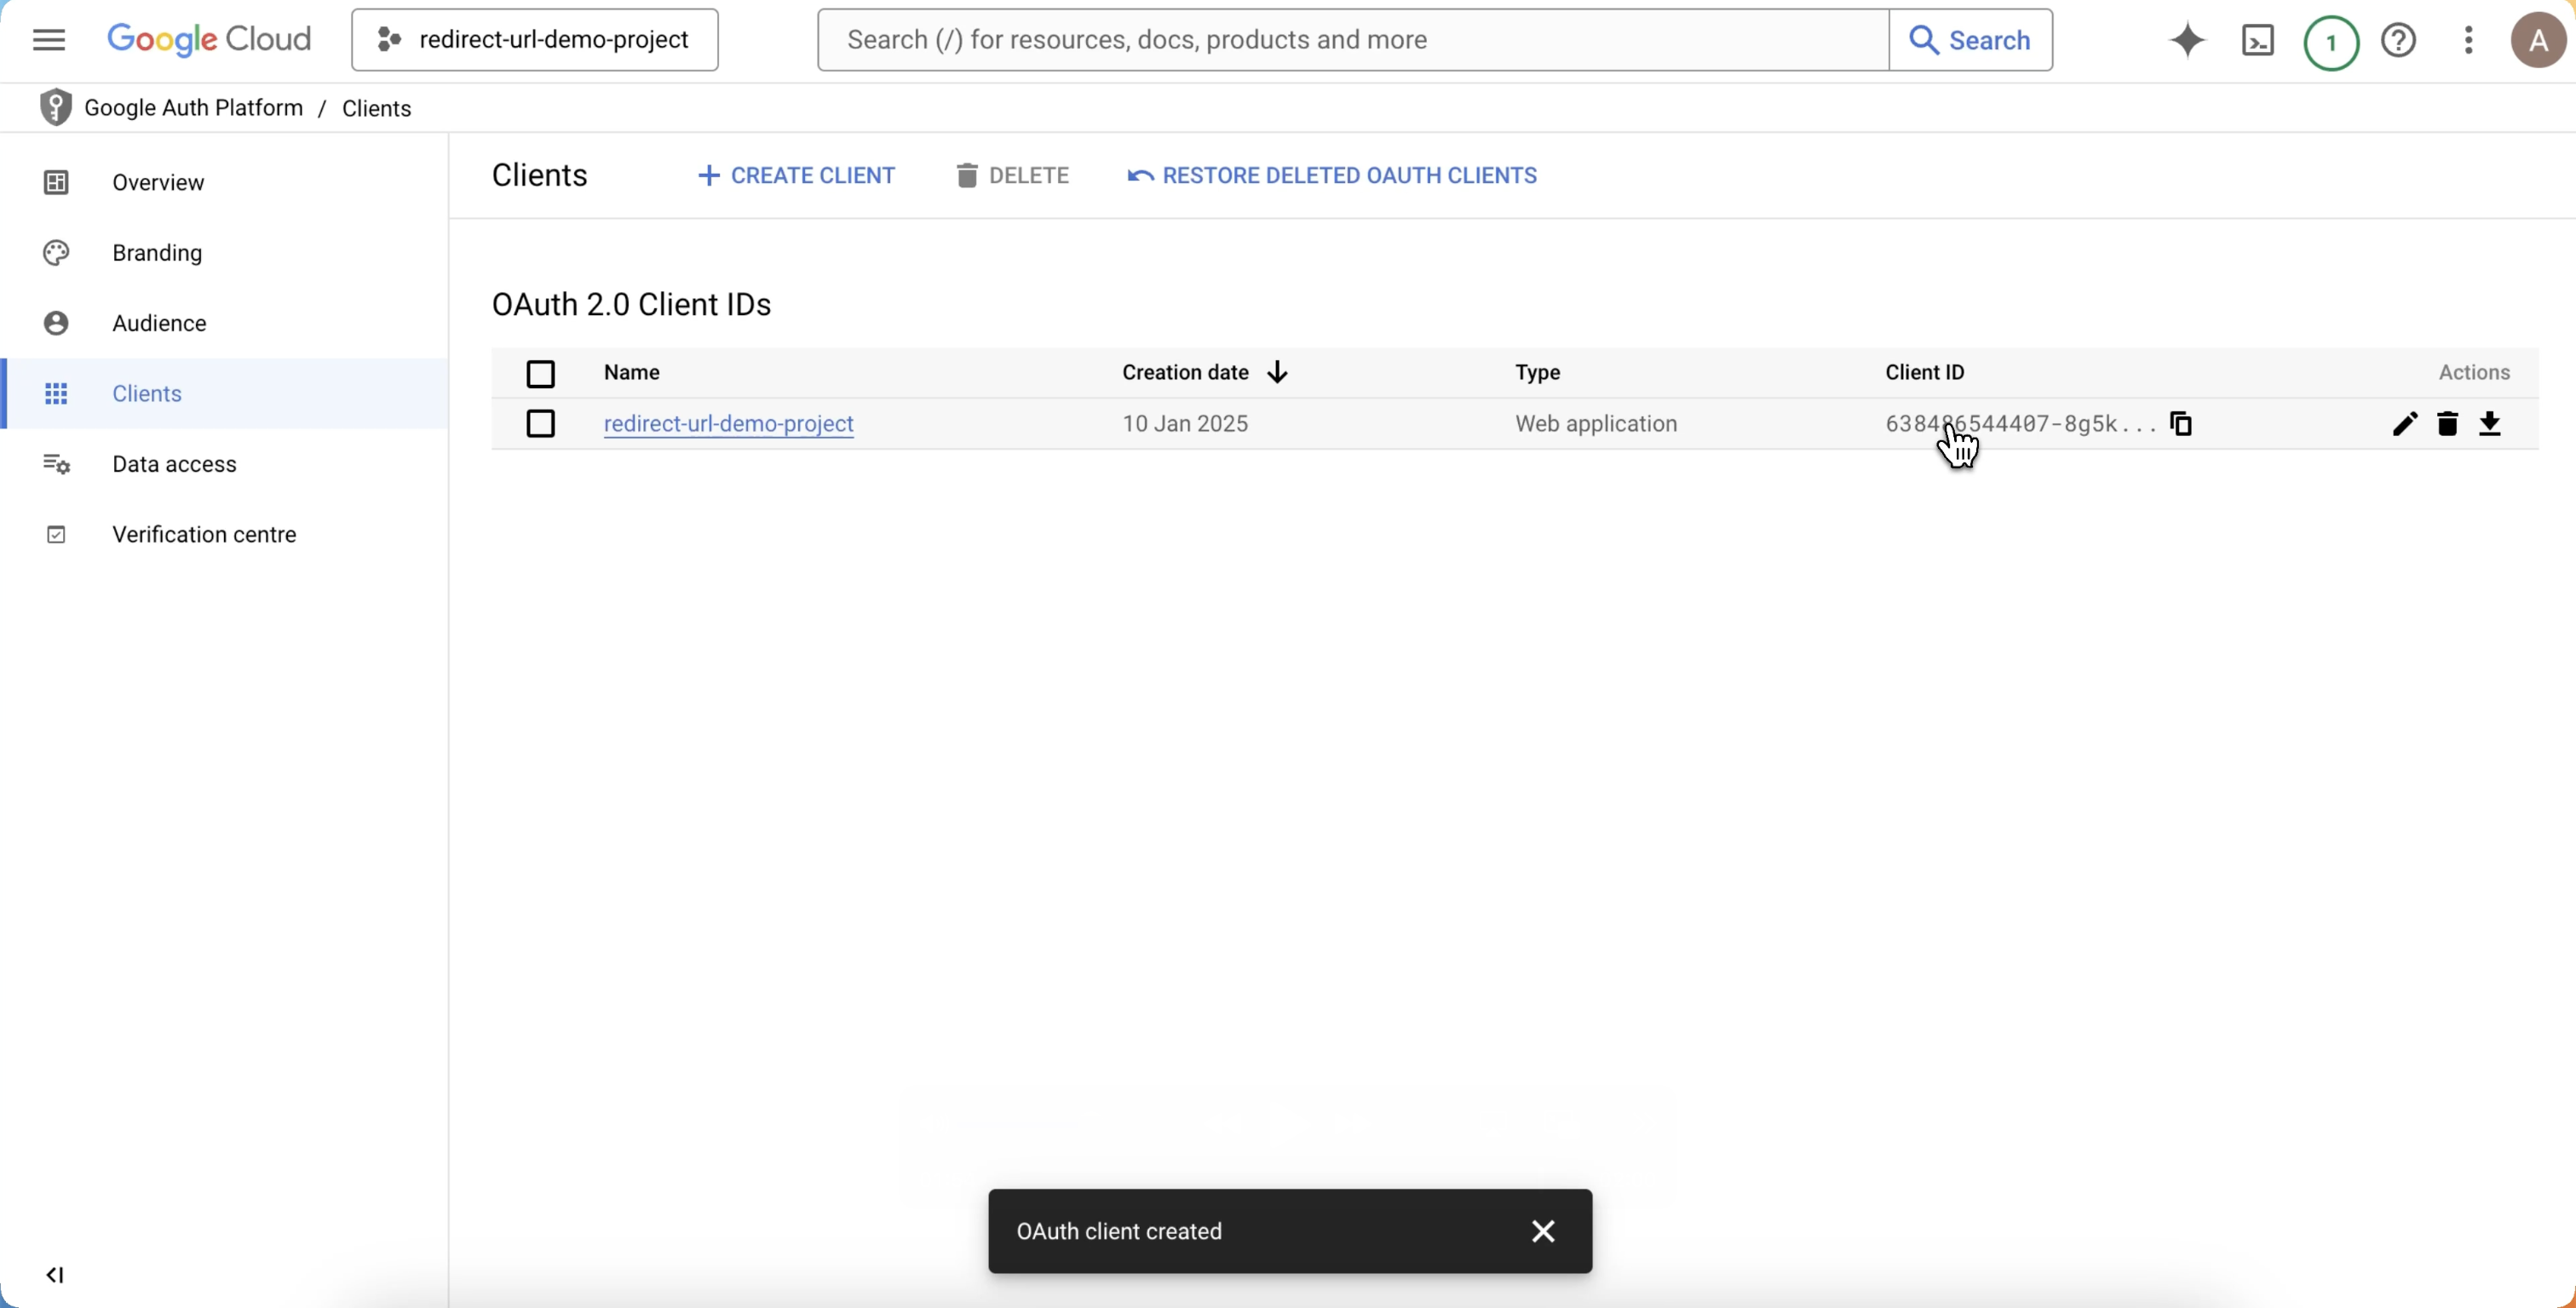
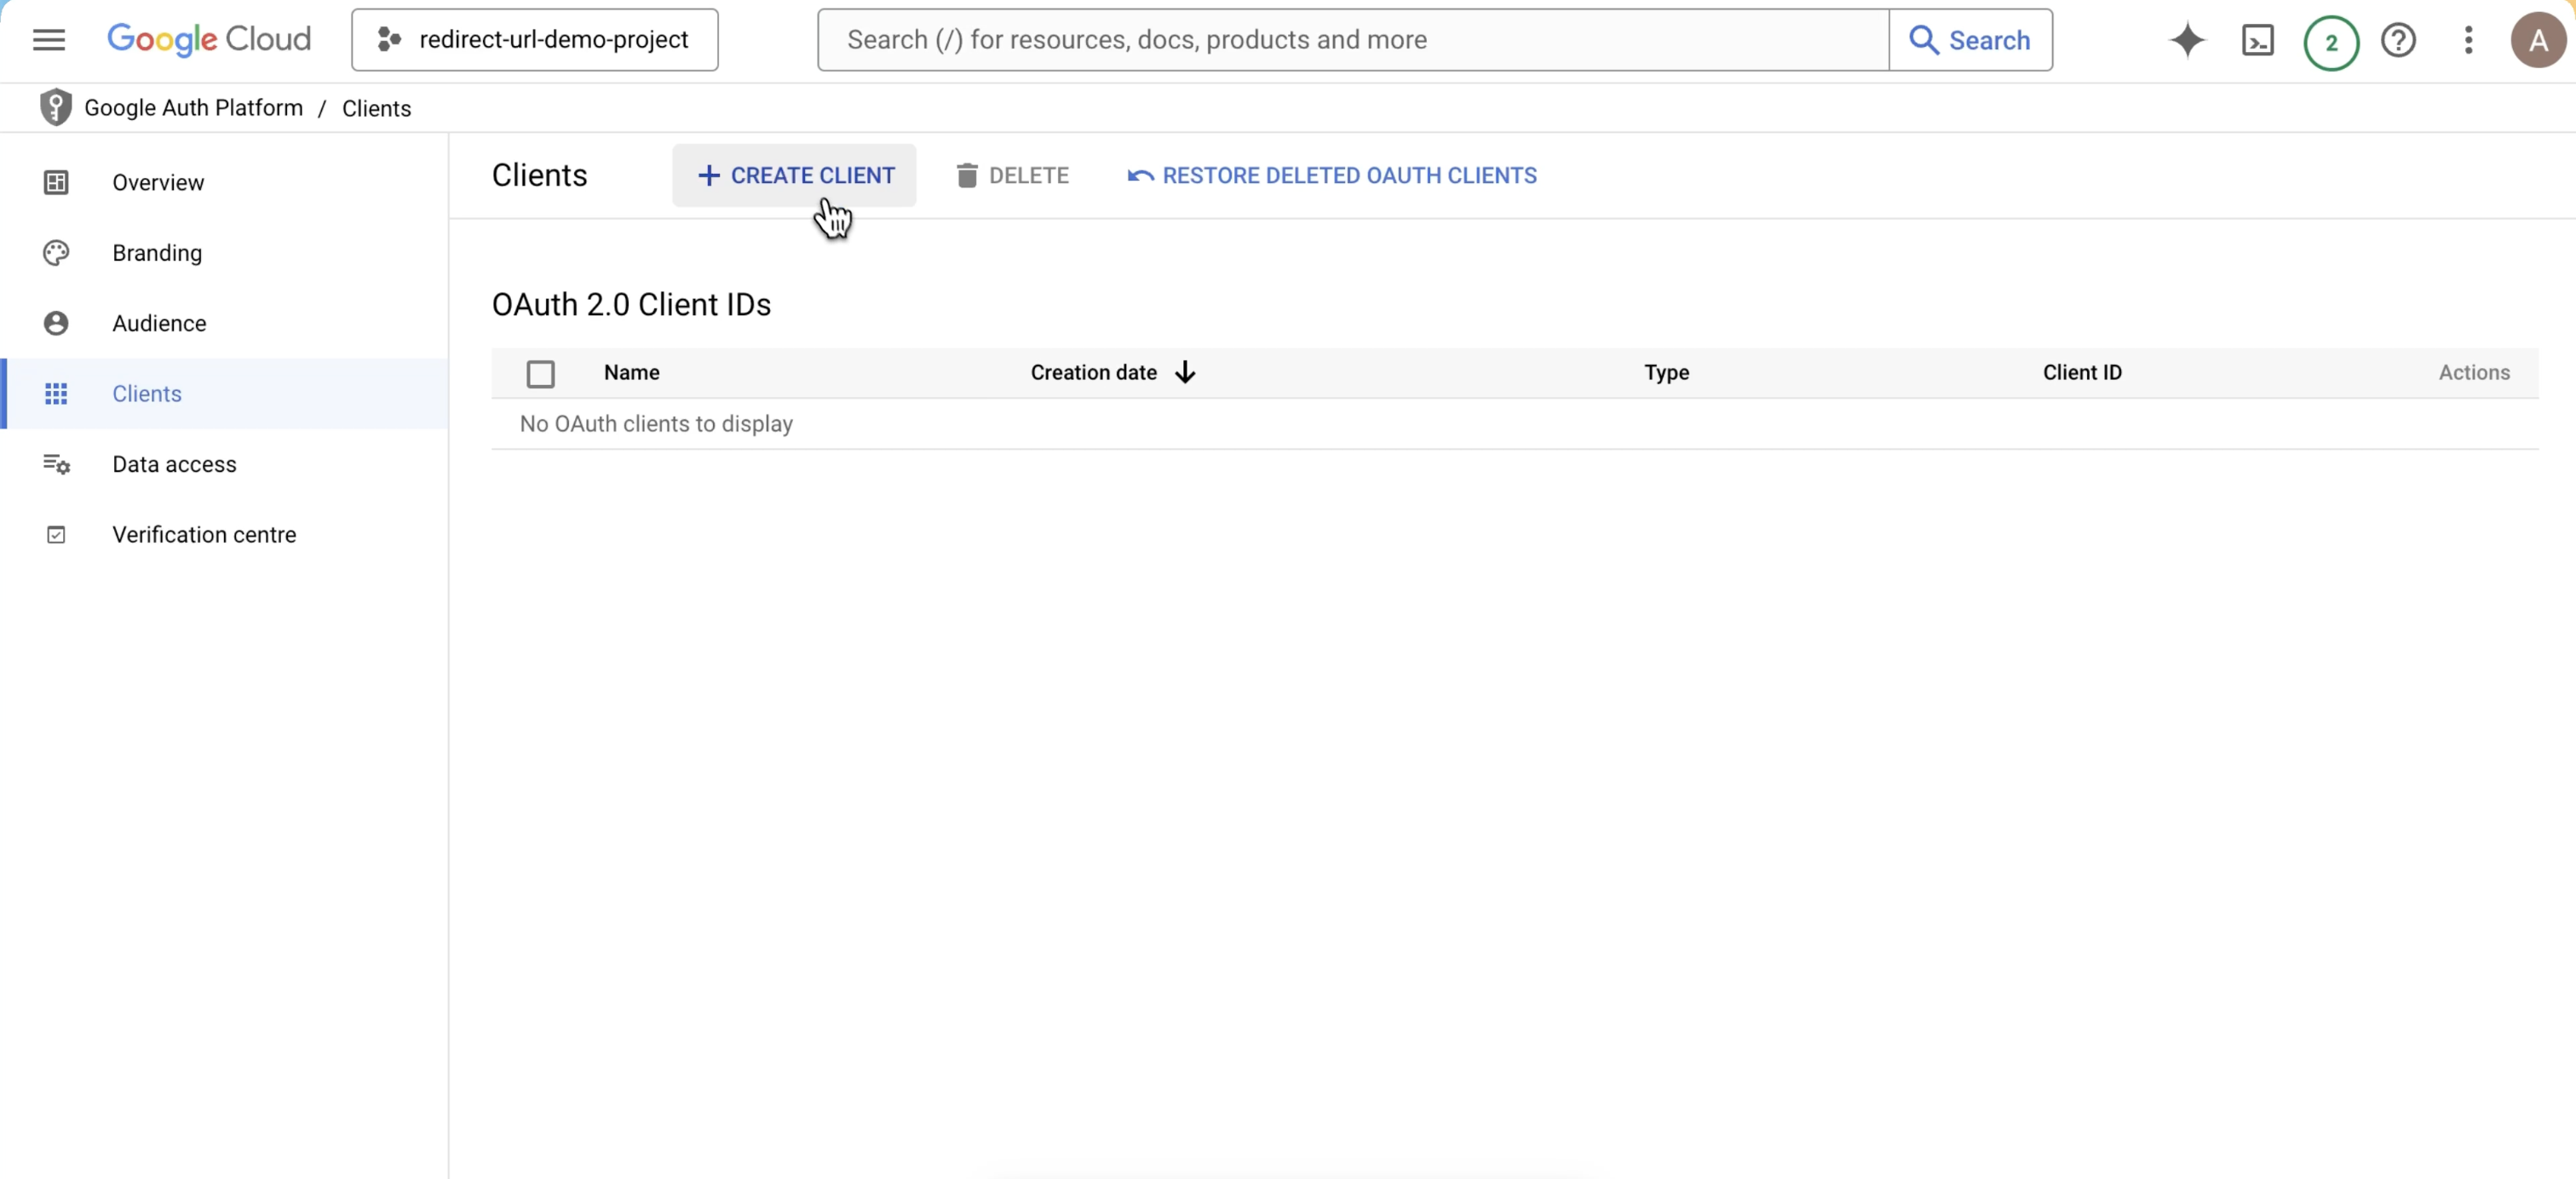
Head over to Clients section:
* Click on Create Client
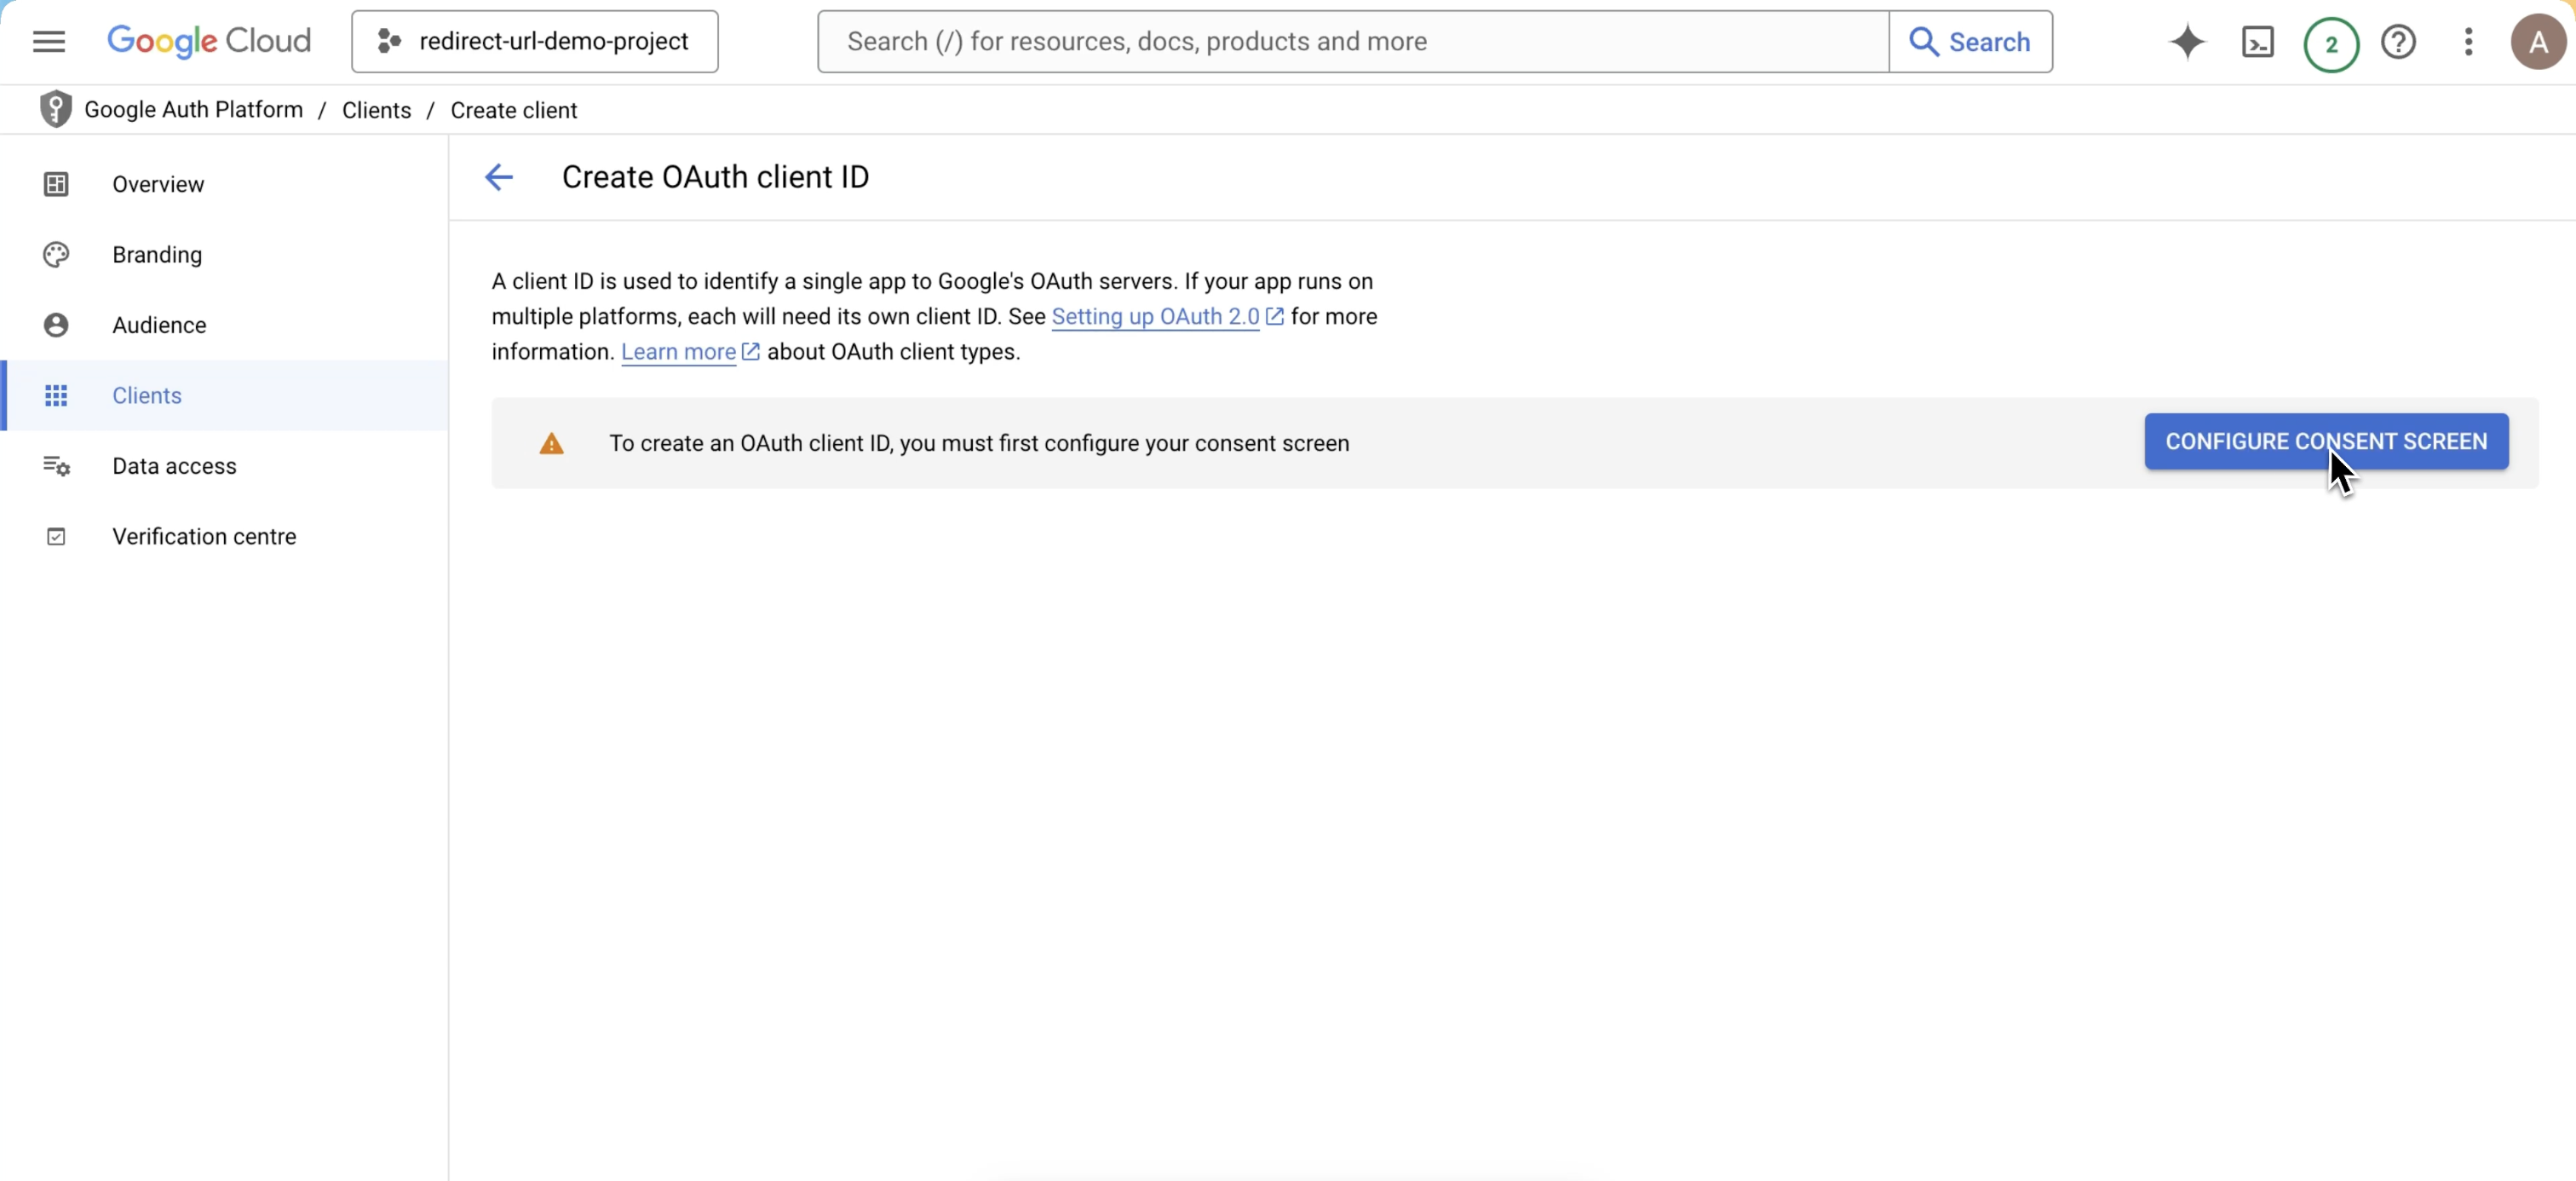
* Click on Configure Consent Screen
* Configure the consent screen
* And you're done, you've successfully created new Client ID and Client Secret for the project
 * Enter a Project name and select the Location for your project
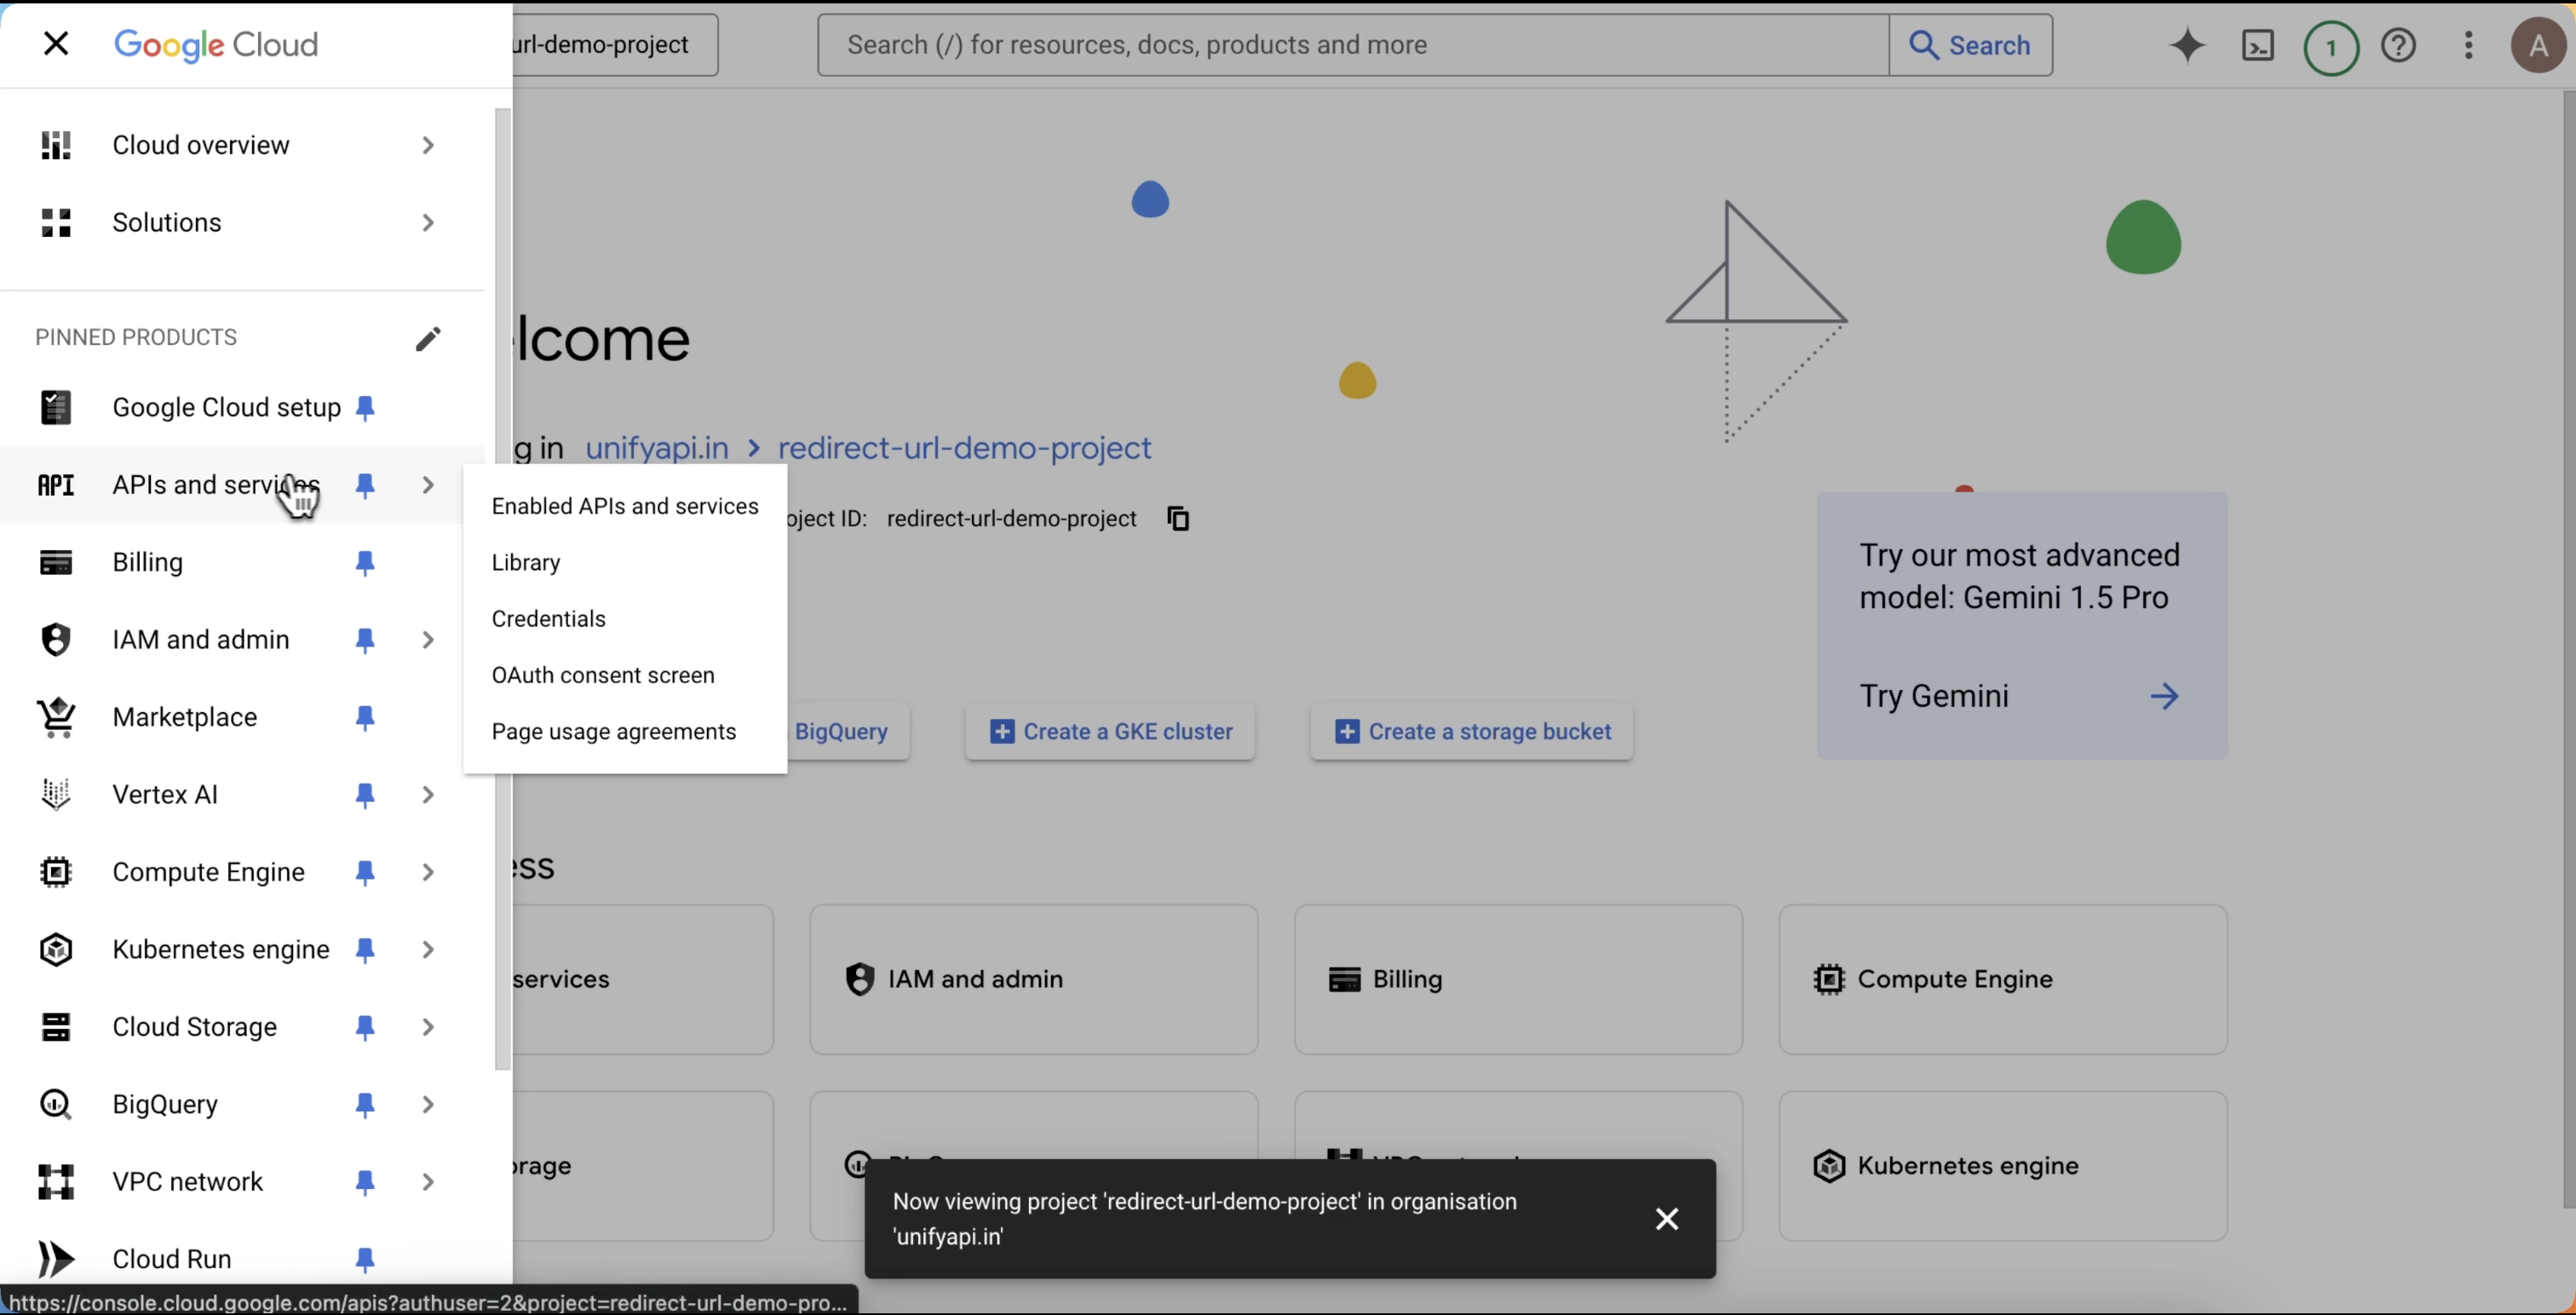 * Click on overview and configure the project:
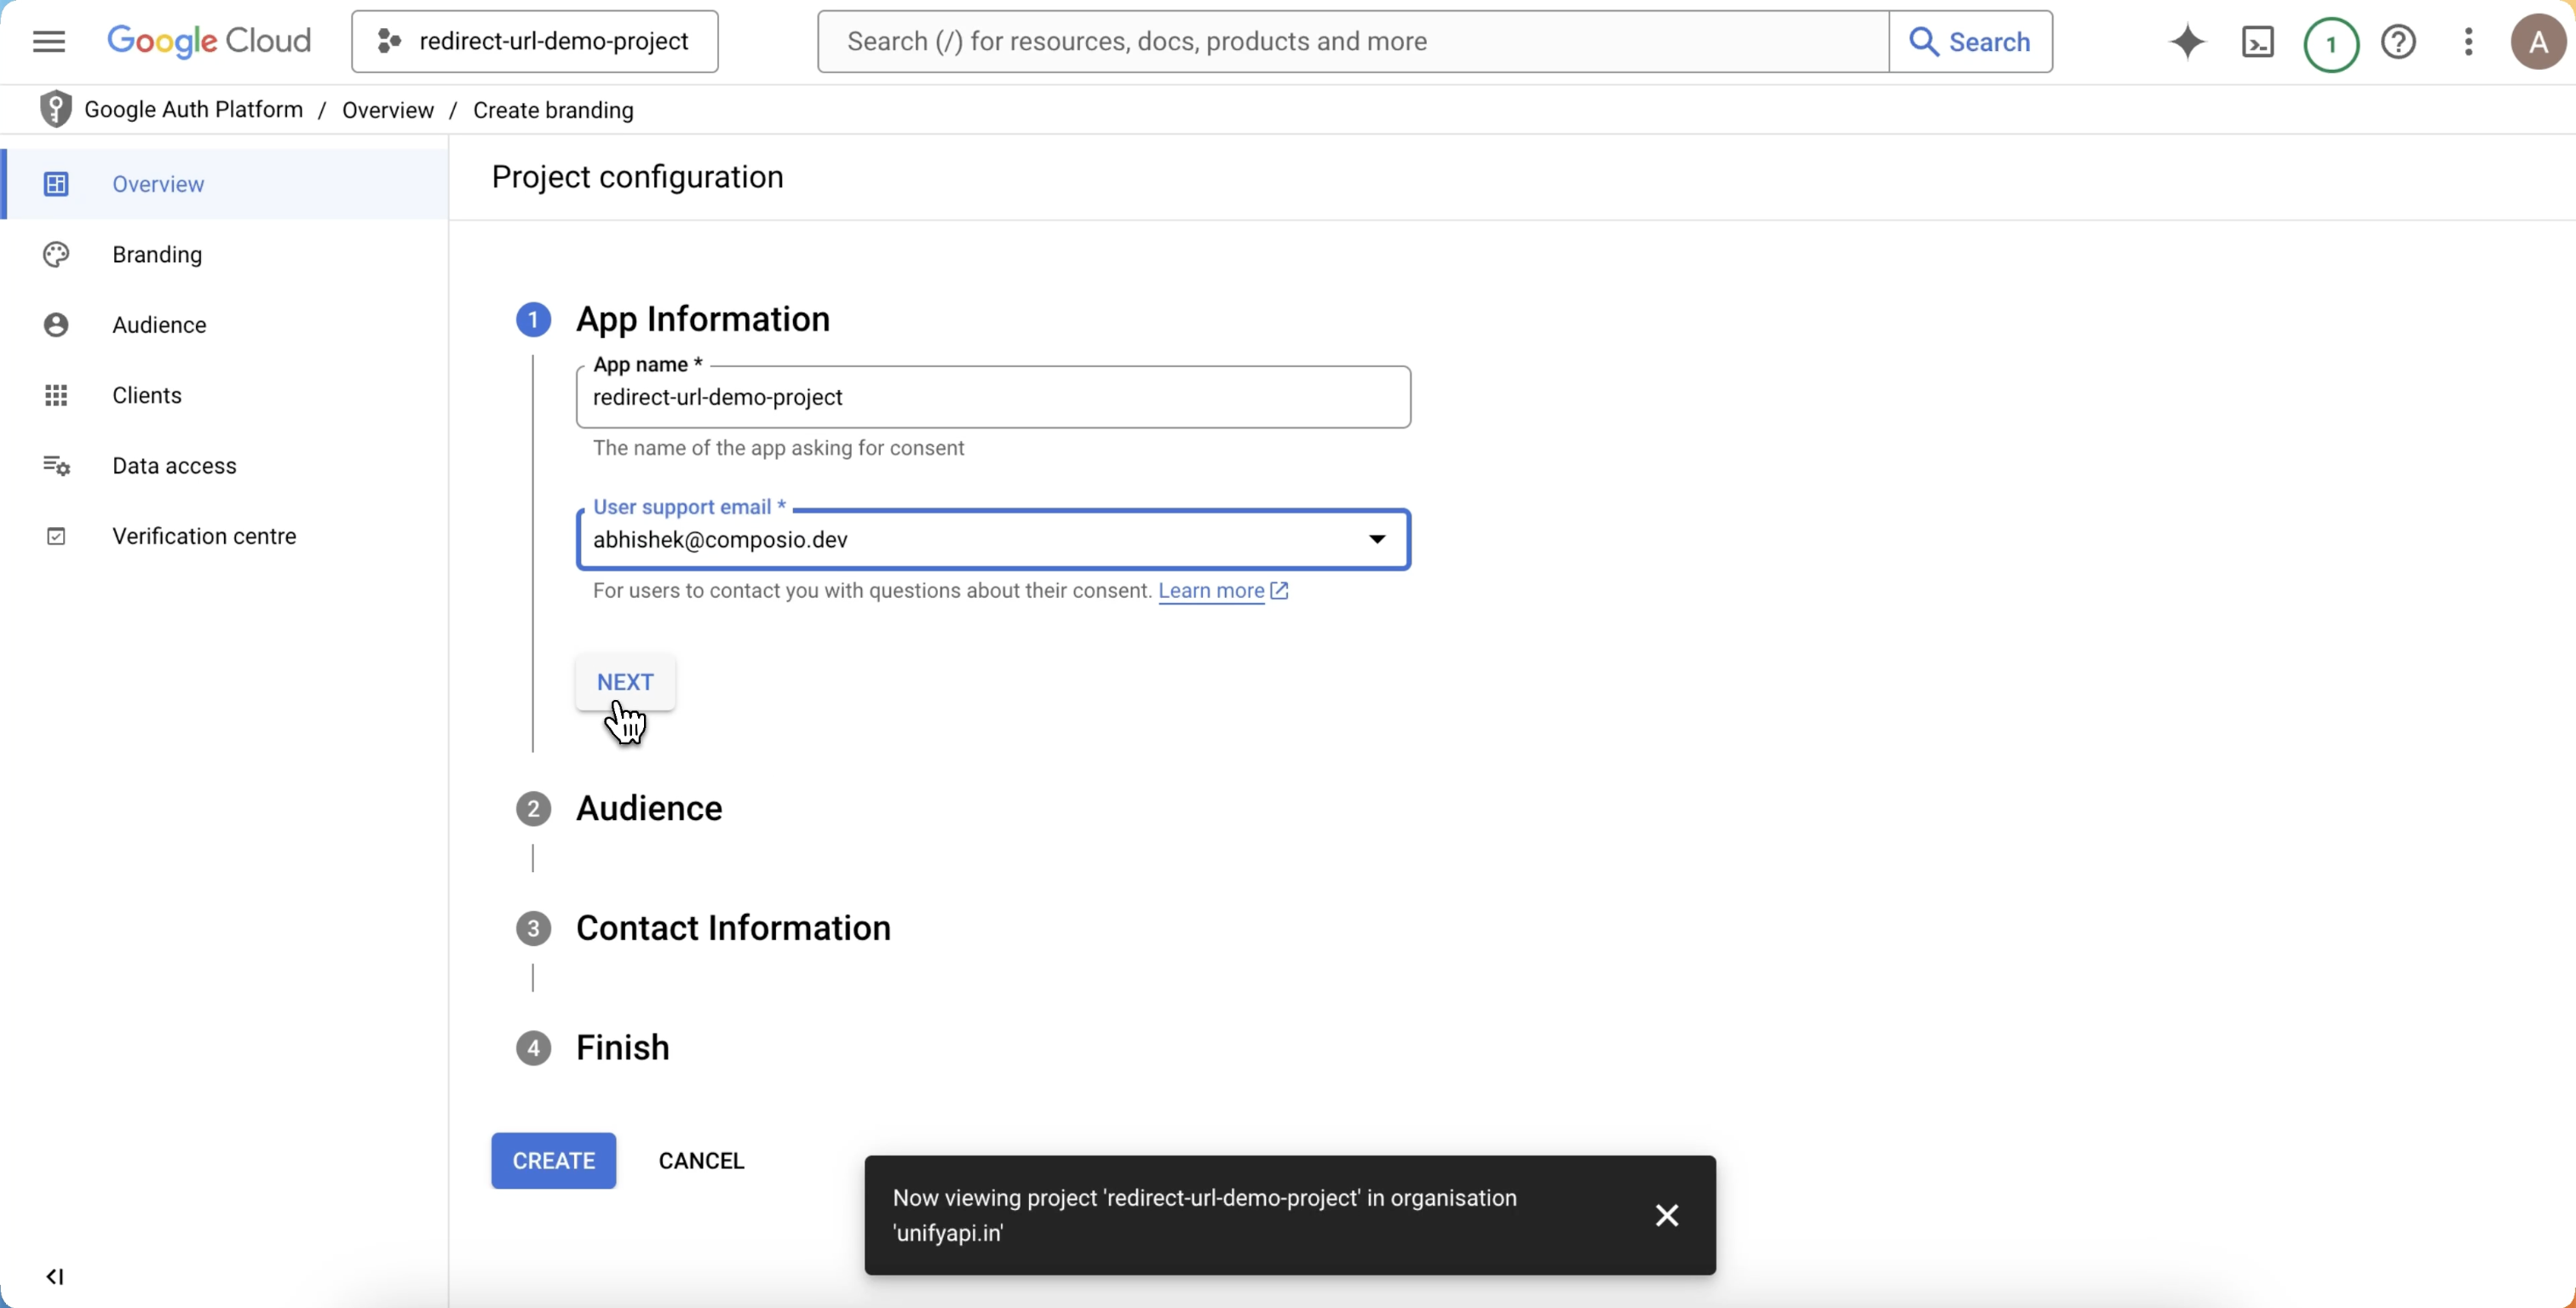
 * Click on configure consent screen
 * Configure the branding
 * then publish the app
 * Click on Configure Consent Screen
 * Configure the consent screen
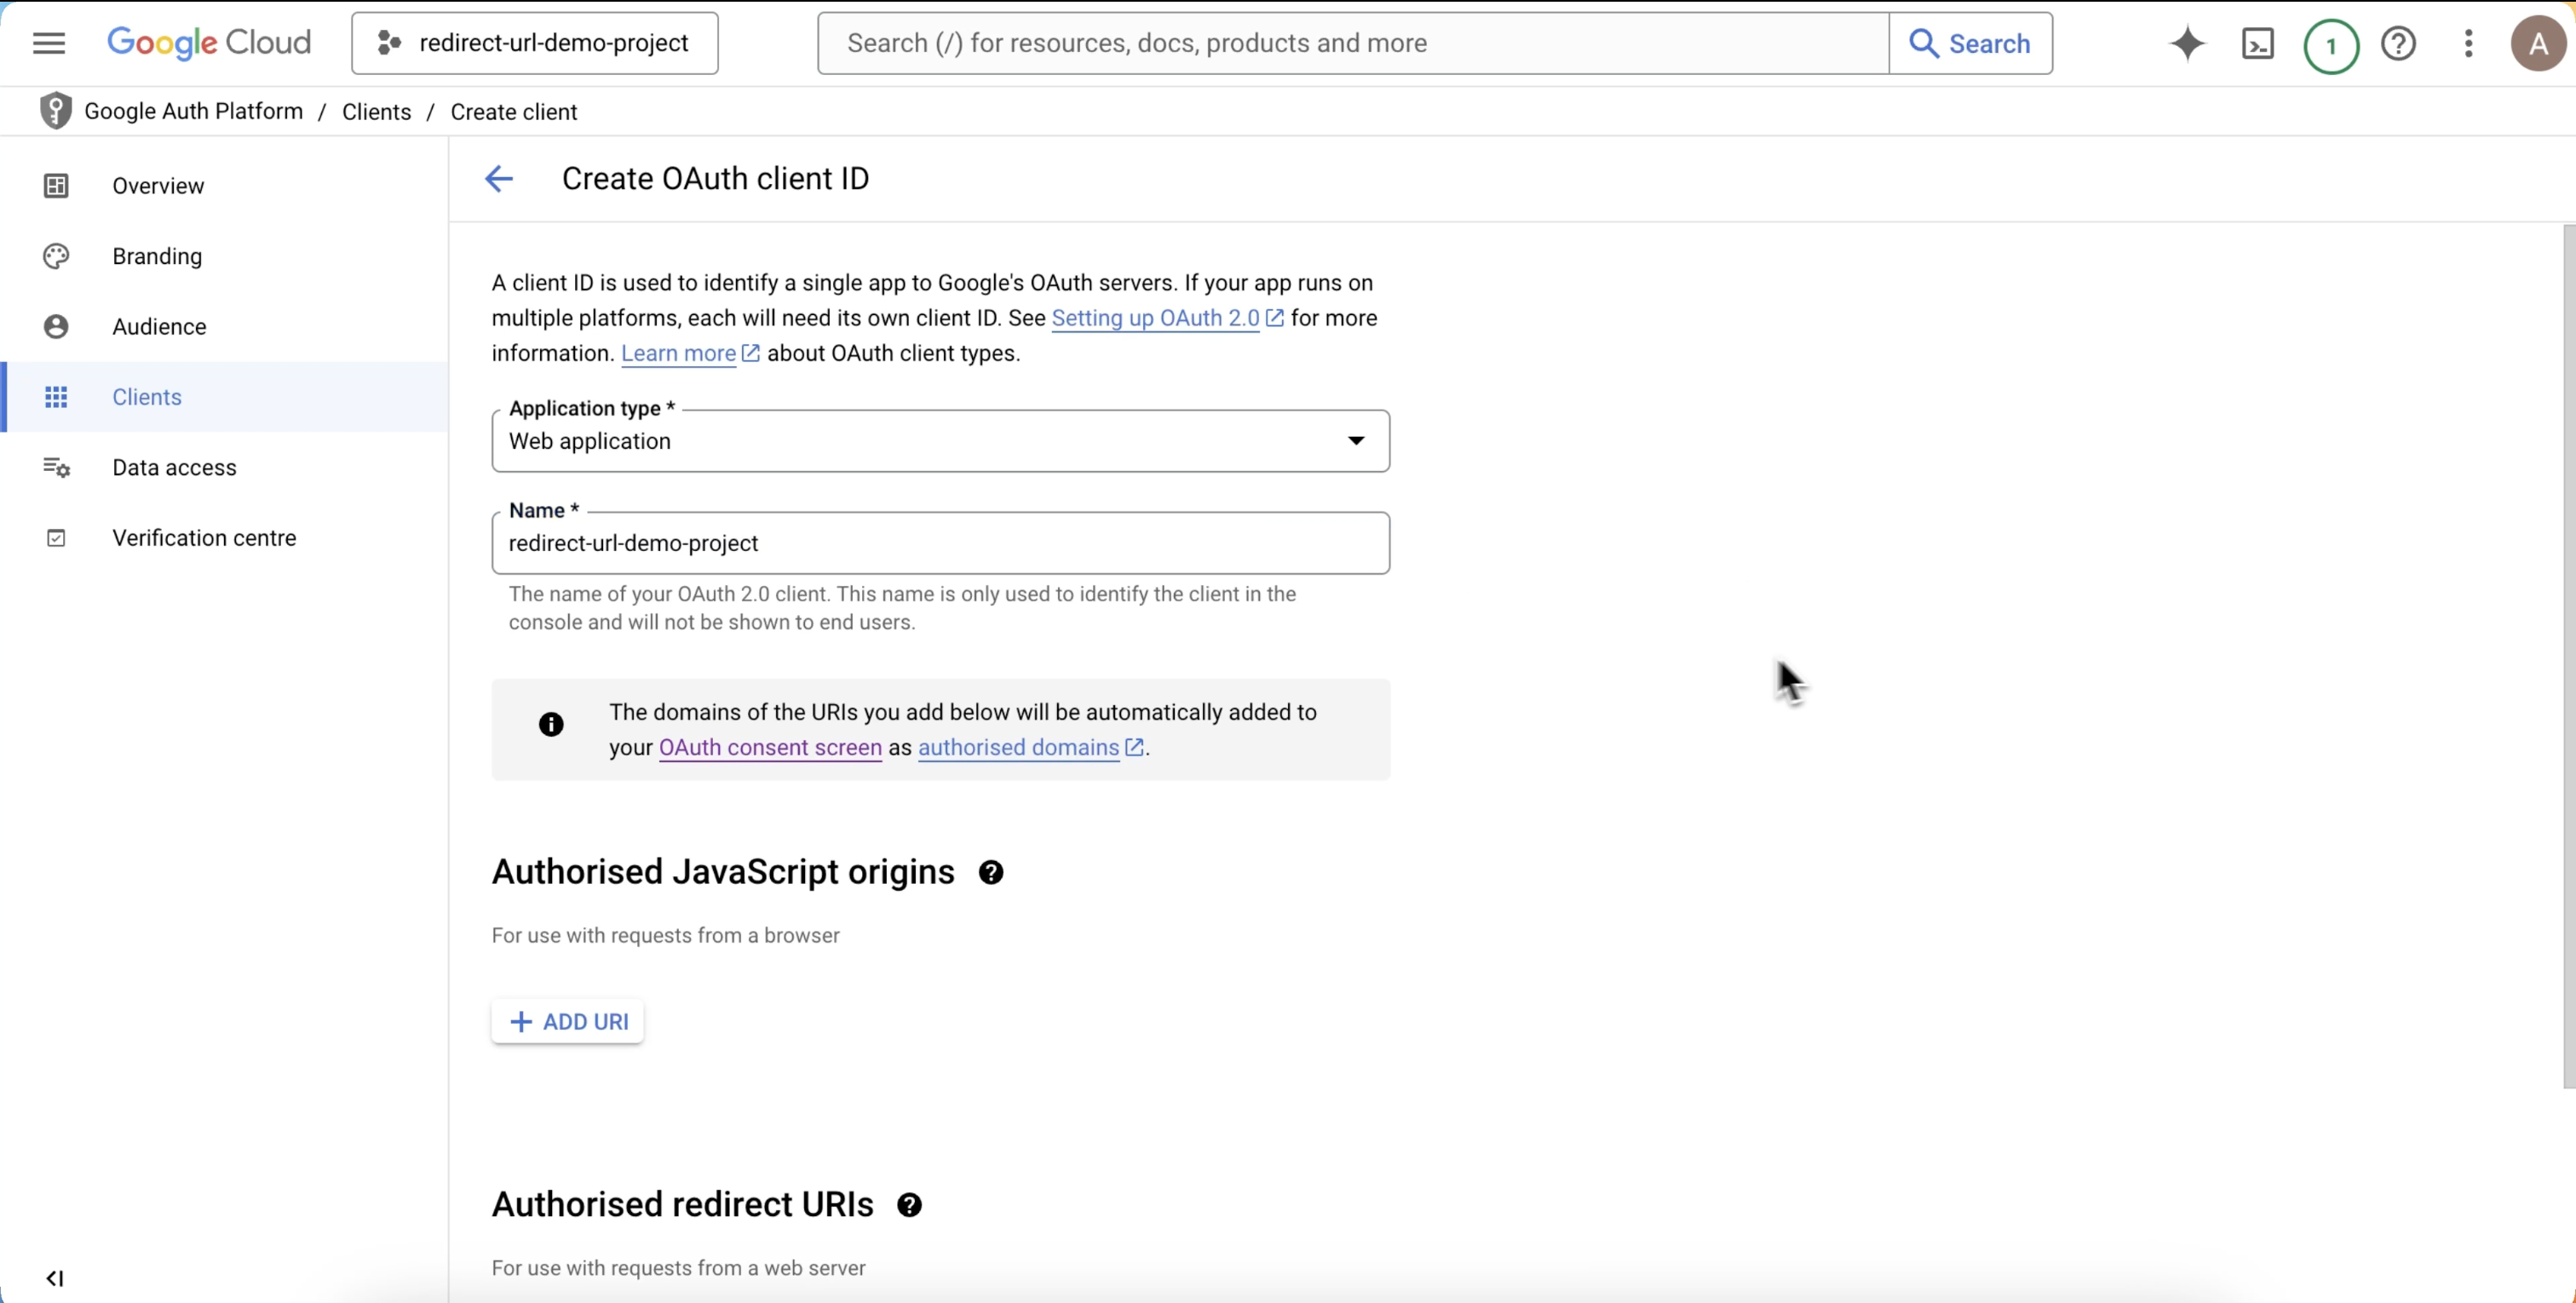 * And you're done, you've successfully created new Client ID and Client Secret for the project